Hamabeads

When I was a kid, six years or so, I loved making necklaces and stuff out of hamabeads. Some were glued onto pieces of wood and used as saucepan mats or wall decorations. Tacky, I know, but I guess my mum liked them even tho they were ugly :) I remember I had pegboards in shapes of butterflies, hearts, stars, animals, squares and circles. Some needed ironing or glue and some were done immediately. I still loved it. When I got older I tried to make nice earrings, bracelets and necklaces but I was never satisfied with the result.

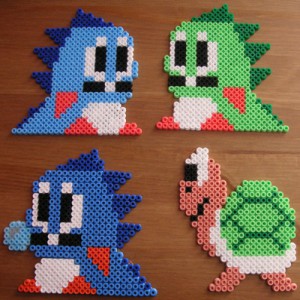
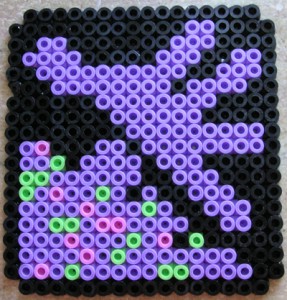
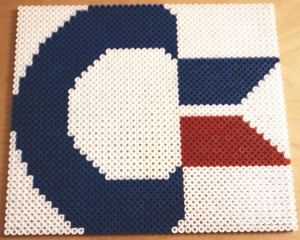
Now I’m back with the pegboards and enjoy the pixel-like art I can make. Mostly well known figures such as Bub & Bob from NES or a KoopaTroopa on request by my brother. I also made the warlock class icon from World of Warcraft (the trickiest so far) and the Commodore logo for a friend.

Not sure what kind of function they have, but using them as table protection (for glasses and saucepans etc) should work fine. As these are better looking than the ones I made in my early days I might even use them as decorations ;)

Shopping bag bonanza

Shopping bags are lovely! Easy to make and personalize and good for the environment if it helps you purchase fewer plastic bags!

I made the first bag back in 2004, a dark and cold winter and I needed some crafting therapy!
I found a lovely curtain fabric with black and gray flowers. It was love at first sight and I still use that bag every now and then. I had to replace the handles and made the second pair of a stronger fabric. Plain and thin cotton is not recommended!

Anyway, my mother also wanted a bag and a friend of mine too and even my granny got jealous of my pretty bag. She loves shopping bags (not plastic ones) and has lots of them. They are getting quite worn out now and she wanted something more fancy.
All bags are made of at least two layers of fabric, which should be enough to hold for heavy groceries as well.

The first picture is of my bag, the first one. Second picture is the one for my mother, third is my granny’s and the forth is the latest bag to the collection! All are made of curtain fabric and cotton on the inside. I couldn’t find any pictures of the one for my friend but it was white with gray and purple chickens, she loved it :)

I have plenty of fabric waiting to be used for bags. Whenever I find a suitable fabric I by a meter or two for future projects. I’m sure there will be more shopping bag posts here later on!

iPod case

About three years ago I got an iPod nano, it was back then when the 3rd generation still was hot (it got replaced a month later by the 4th gen.). Me and many others don’t like scratches and marks on our precious electronic devices so I decided to design and make me my own iPod case before I had used it too much. Scratches usually appear when the device is brand new…

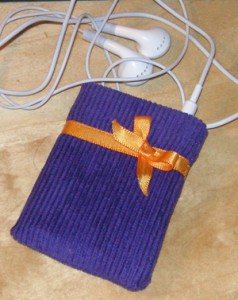
I found a violet colored manchester fabric and some silk ribbons. I thought the orange worked best with the purple and the rosette gave it a cute touch!

It was very easy to make, I just measured the iPod’s width and height, cut out a piece with margins for the seams. I used my zigsag seam around the edges, folded the top edge and sew the ribbon (& rosette) before folding and sewing the piece together.
Since I didn’t use a button or strap to keep the cover on the iPod I had to make sure the iPod fit perfectly. The cover is slightly smaller than the iPod and it doesn’t fall off. I recommend using a fabric that won’t stretch out.

I havent made any more covers, but it was fun and easy. The only limit is your creativity!
One tip: Avoid making too large knots on the inside as the thread itself can scratch or mark the iPod. I place the shiny side towards the rosette to avoid worn of marks on the click wheel and display. I know the newer iPods have nicer backsides so keep the inside soft to avoid unwelcome marks!

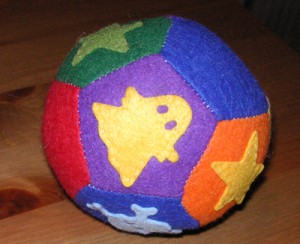
A felt ball for the younger ones

My youngest cousin celebrated his first Christmas and all of us gave him presents, who can resist buying toys or tiny clothes?

Of course I bought clothes too but I also wanted to give him a ball that reminded me of one I had when I was a kid. A soft and colorful ball with a bell inside. I have heard that kids like bright colors and at the time he was almost hypnotized by bright, red colors!  He just loved the red cow on our milk packages.

My idea was to make a nice and colorful ball of some sort of fabric.
I went to my local crafting store and found figures and sheets of felt. They did feel quite weak and I was afraid he would be able to tear the ball apart. Later on I heard he did, but apparently he loved it!

I found a pattern at the shishi girl, which I used, I just made the pentagon a bit smaller.

I chose to use two pieces of each color, none of the same beside another and the figures were stitched by hand. I’m quite satisfied with the result but next time I might use a better fabric or strengthen it with a cotton layer or vlieseline!

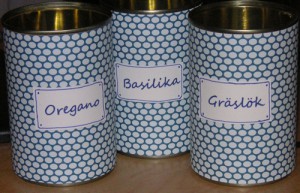
Pimped cans

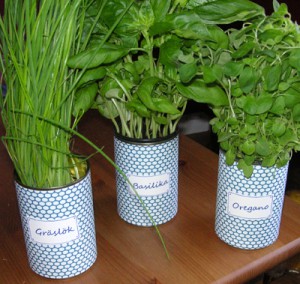
Panic! A party to attend and no pots for the fresh herbs I was going to give away with a nice pair of scissors. No time to go shopping, what to do?!

I looked around to see if I could find anything nice and useful to put the herbs in but I found nothing. I had an idea in the back of my head about using old cans as pots, not very fancy but functional. And if you want that kind of look in your kitchen? Knock yourself out! It’s trendy to re-use items nowadays too!

Soo, I put the plastic pots in the cans and they were a perfect match. I just couldn’t find a better pot with almost no time! I decided to use some of my scrapbooking papers I barely use.

.

The result wasn’t too bad to be honest! I was satisfied enough to be unbearable, and happy to have the gift ready.

As my handwriting is horrible I looked for a nice font and printed the text on thick paper, cut out the text and filled it out with a pen and decorated the labels.

Easily done in almost no time!

I might just pimp some more cans for myself with colors that match my kitchen, we’ll see.

EGON

EGON is a fusion of GRUNDTAL and STAVE. It’s perfect for small apartments and compact living.

I live in a 30 square meter apartment with large windows, many doors and little free wall space due to fantastic planning. And like any girl, I’d love a huge full-size mirror. The only problem is that I don’t have the required wall space available.
When I broke my KRABB mirror (while sleeping) I made my way to IKEA and purchased STAVE without thinking twice. Thrilled over my new mirror I went home and realized that it would be impossible to put it anywhere on the wall except behind a door, which would work perfectly fine except for the fact that I need the space for my purses and shoes.

I asked my dad if it’s possible to hang 10 kg on a door without breaking it, and if he thought we could figure something out for my door. Since I have to use every space possible I already have a bunch of GRUNDTAL hanging around over my doors and my dad took one home for examination.

After removing the protective rubberplasticthingy on the back side he found out that the hooks were drilled and pressed into holes in the main part of GRUNDTAL and it was really easy to remove them!

My dad likes to weld things (unless it’s rust on a car) and had some screws and washers lying around just waiting to be used. So we decided to give it a try and I got to learn how to weld!

After a few hours of preparations and welding (yaay) we got a pretty decent result. A GRUNDTAL with two screws sticking out just enough to fit the holds on the mirror.

I also taped some protective plastic on the backside to avoid marking the door.

Since STAVE should be able to hang both horizontally and vertically we didn’t think it would be an issue to hang it vertically on the door by moving the holds to the shorter sides of the frame. We were wrong. After only one or two days the frame started to break apart. I moved it to the floor before it actually broke.
The frame around the mirror piece is not strong enough to hold the entire weight of the mirror, that’s why the holds were mounted along the longer sides (should have figured that one out).

We went to Bauhaus and purchased an L-shaped aluminium frame, cut it off for perfect fit and drilled holes to fit the ones in the wooden frame.

We put some more hot melt on the backside of the mirror to make it stronger and more stable.

We glued the aluminium and wooden frame together using contact cement (just to make sure it would be strong).

Luckily the original screws were long enough to reach through the aluminium frame too (we did put some glue in the holes as well) and we were able to mount GRUNDTAL safe and strong to the slightly improved STAVE frame.

And voilà! EGON was (re)born!

To avoid the mirror bumping into the door I put some double sided tape (used for scrapbooking, the thicker type) on the bottom part of the frame and to keep the door handle from damaging the mirror I used FIXA.


I still keep an eye out for EGON to make sure it will hold. It’s been a few weeks now and it looks good. In case we need to enhance it later on I think the plan is to add some metal parts in the corners to even out the weight to the longer sides too. If that won’t hold I’ll replace the frame with real oak pieces instead.

The hack cost me less than 700 SEK (about $95 or €75).
STAVE: 549 SEK
GRUNDTAL: 45 SEK
Aluminium frame: 70 SEK
Since the screws, washers, tape, glue and protective plastic were something we had lying around I don’t know the prices, but I doubt it will add up to more than a total of 700 SEK (unless you have to buy glue and tape etc).

Happy hacking!