Leon’s third birthday card

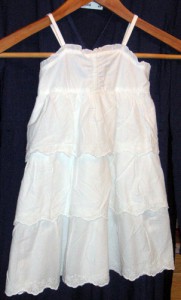
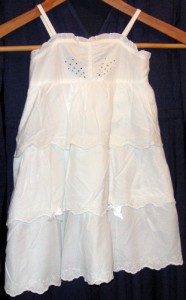
My cousin Leon turned three a few days ago and he wanted a white dress for a princess costume. He was very certain with the looks of the dress, no puffy cupcake-styled dress! It was supposed to be simple with some pearls and a necklace. So I made him a card, found a dress (wish I’ve had time to sew one for him instead) and pimped it a bit. I think he liked the dress but he did look somewhat disappointed when he opened the present. We asked him to put it on with the tiara and all and he did, he’s such a sweet boy! Now I have the perfect picture for his graduation day, he he. Just another 15 years to go!

Here’s the card and the dress:

I decided to make an easel card for the Alota Rubber Stamps’ challenge #81 and since the card is for a young boy I decided to enter Going Buggy’s April challenge which was  to make a card for a child, any age, too!
The card was easy to start with, I had to have Lightning McQueen on it since it’s his favorite from Cars! The letters are just a lot with all the colors but it turned out OK and I got an opportunity to use them!


Theme 97: Retro

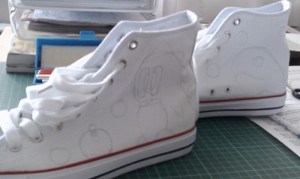
I’ve had a super awesome idea in my head for a while now and this weekend I decided to make it real. I started with purchasing white sneakers (cheap ones in case I’d fail). These ones are from skopunkten.

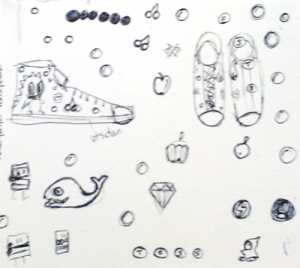
The second step was to do some sketching for what to draw on the shoes. I also ordered pens for coloring on textile.

And for the fun part!

I started with some light sketching on the shoes using a pencil. Be careful not to make to hard lines.. it’s not easy to remove them afterwards.

And then, time to put some color to it! I was a bit too eager to color and didn’t let the areas dry before adding a second color right next to it, this causes the color to bleed so be careful!

I must admit that I am very satisfied with the result, I wish I had this idea a few years ago, I feel too old to wear shoes with cartoons on them.

DIY: Yoko’s scarf

I finally had the time to draw the instructions for how to make the scarf, I’m not very artistic but I hope you can understand it anyway.

First of all you will need to get these items before starting:

  • Fabric, I used fleece in two different colors but use whatever you like! you will need 7 pieces and one piece is 12×42 cm. So if you have a fabric that is 140 cm wide, you’ll need about 30 cm of it. This scarf is quite big so if you prefer a smaller one or a kid sized, you’ll need even less!
  • A 20 cm zipper
  • About 2,5 m silk ribbon of your choice, I recommend to use a ribbon wider than 1 cm.
  • A sewing machine (or a lot of time)
  • Thread
  • Scissors
  • Pins

First step: Cut out 7 pieces of the fabric. Each piece at 12 x 42 cm and measured for 1 cm seam allowance.

Pin the pieces together with the right sides facing each other, start with one pair and add the pieces one by one. Sew them together with a straight seam.

Since I didn’t have my iron with me, Malin suggested that I sew a wide zig-zag seam over the seams to press them down. Very clever idea!
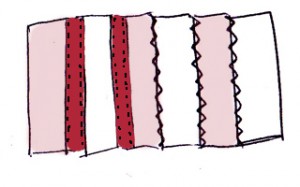
When you’re done it’s time to attach the ribbons. I measured and cut them on the scarf but they should be about 42 cm long.
Pin and sew the ribbon from the right sides, hide the seams with the ribbons and use a thread in the same color as the ribbon. I sewed quite close to the ribbon edges, as close as possible will give a better result!
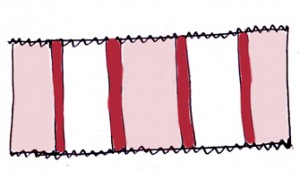
When the ribbon is in place I sew a zig-zag seam over the edges to avoid the ribbon from unravel. If you use a fabric that might unravel you will have to do this on all sides.
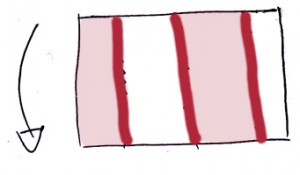
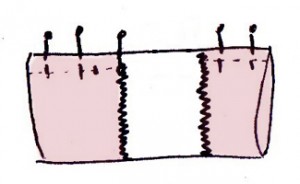
Fold the scarf with the right side facing itself and the zig-zag edges touching. Make sure you see the back side before sewing along the edges and leave a few centimeters open in the middle so you can turn it inside out later on.
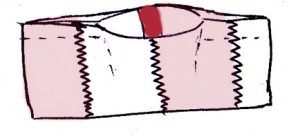
The scarf should now look something like this.
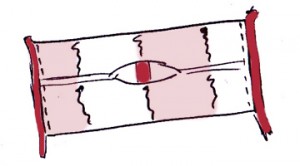
And now it’s time for the tricky part. Fold the scarf so the seam is in the middle of it and attach the zipper, one part on each side of the scarf. Make sure it’s turned right and that the zipper is on the inside from here, also make sure the seam-side will become the inside. Pin and sew the zipper, try to get the seam close to the zipper using the appropriate presser foot.
Before sewing you can turn it inside out to check it looks good and seems to be correct, just be careful with the pins.

When you’re done it’s time to turn it inside out and make sure you can use the zipper. If you have to change something just do it now. If not then close the hole on the inside either using your sewing machine or by hand. It will look better if you do it by hand but it works just as good with the machine. Just make sure to leave the outer fabric alone so there will be no seam visible from the outside.

And now you’re all set!

Cosplay: Yoko from TTGL

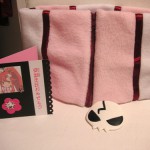
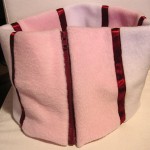
At last! It’s time to reveal the super awesome epic gift! As you might notice I am very satisfied with the result but most of all, with the great success it was! I wasn’t aware of how much Veronica likes Yoko or the fact that it’s one of her favorite characters, but apparently it is and that just made me even happier.
My first idea of a gift was a simplified Pikachu suit/costume based on a modified bright yellow hoodie. Unfortunately bright yellow is not very trendy this year so it was next to impossible to find one without any details and with the right color for a reasonable price. My plan B was to sew one myself but I realized that I don’t have that much time to spare in order to be finished this year. Luckily she mentioned Yoko one day at work and showed me the scarf.
When I got home I had forgotten the name, but thanks to my Google-skills I found her and a few episodes of Tengen Toppa Gurren-Lagann for further studies. The images I found were mostly cosplay or fanart. That won’t do! I always aim for perfection, so I watched the anime (I think I might continue watching one day) instead and kept searching for a decent image.
A few days later I ordered a bordeaux colored zipper, silk band, light pink and white micro fleece and some other fabric for a few upcoming projects. And then I just had to wait for the Saturday to come, no pattern to follow, just a nice picture of Yoko and an idea.

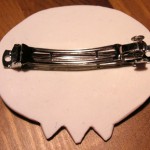
I also made a card out of the image I used for inspiration. The skull is made out of polymer clay and the card says “happy birthday” in Japanese (yes, she was able to read it!).

Anyway, enough chitchat. Here are a few pictures!

Unfortunately I didn’t think of taking pictures along the working process but I’ll give you a quick DIY guide later on. I kind of feel like drawing the instructions so I’ll post the guide later in November!

Suit up!

Today was the international suit up day (according to facebook) and since I like to dress up and join masquerades etc I wasn’t late on planning my look for the day.

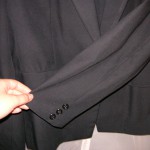
I found an old suit my granny and I made for my graduation five years ago and the jacket still fitted, somewhat at least. It surely did look better five years ago, he he. Anyway, I won’t miss an opportunity to dress up and wear a tie!

I was very satisfied with the result of our sewing, her are some pictures, not the best but good enough to get an idea. Both patterns were taken from Burda magazines, not related to each other.
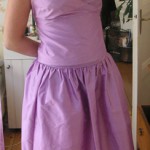
I never had the time to add lining to the jacket but it looks good anyway!

Another sewing project I had the same summer was clothes for my mother’s wedding. I used patterns from Burda this time too and the fabric I used was dupion silk. I also made a purse in the same fabric.
I like details and I sew some of the visible seams with silver glittery thread and I embroidered a silver heart on the skirt.
The silk was nice and cool during the warm summer day in the end of August. I wore black ballerina shoes as well, the same shoes I wore on my graduation day. Love them!