Another IKEA hack, Tolsby

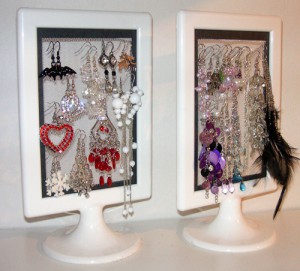
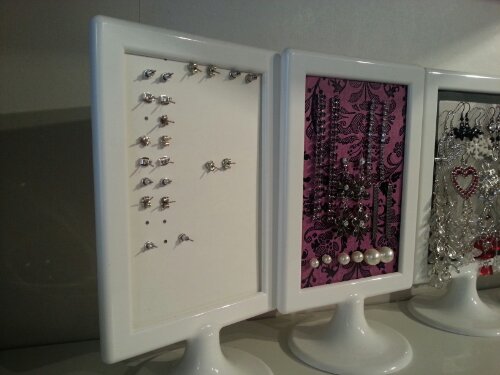
Unfortunately I didn’t come up with this one myself, I got inspired by this post on IKEAhackers and I just had to make myself a few for all my earrings. Before the hack was born I used one of those paper stands for mail and such, similar to IKEA’s DOKUMENT webbed surface. Perfect for earrings with hooks!

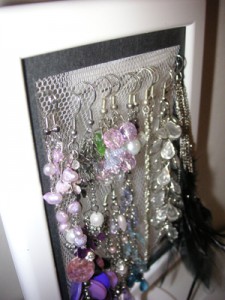
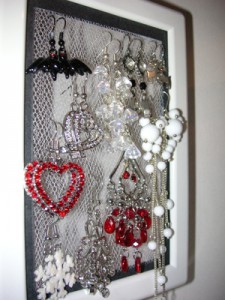
I got bored and thought this would look nicer, unfortunately I had no cross-stitch canvas at home, just some tulle and thicker paper. Since the tulle is quite soft and weak it wouldn’t stand in the picture frame with any heavier earrings on so I created some sort of frame with my thick paper. I had to use both double-sided tape and super glue to make sure it would hold up. I even put a few staples around the edges, I don’t trust glue that much ;)

As you can see, my earrings are quite heavy and the tulle does hang down a tiny bit on the left image.


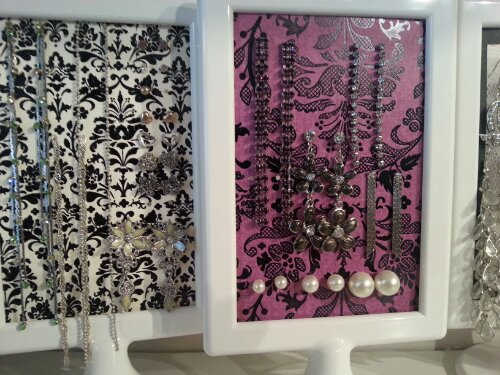
After putting my earrings up I thought I needed something for my pin earrings so I took some of my favorite paper (both are from DCWV’s collection Black Currant) and punched small holes to stick the earrings into and close on the back side.

image  image

If I ever get bored of the paper in the frames its so easy to replace. I’m sure it works with paper for the hook earrings as well.. maybe one day ;)
It does bother me a bit that the pattern is very bold, it does look quite messy but I just love the purple one, it looks great with the white frame too!

Theme 24: Flowers (on a lamp)

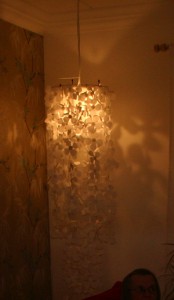
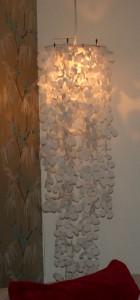
 This project has been in my head for quite a few years now. I saw this outstanding lamp at my aunts house, I can’t even remember when it was, it’s THAT long ago! She got inspired by this beautiful creation but thought it was a bit expensive (and creatable). I might have a picture of her lamp somewhere… Yes! And now my lamp feels scrawny, have to feed it with a few more strings of flowers, or well, my lampshade is a bit smaller so it might look weird. I will look into it when I actually have space for it. Until then, here’s a short DIY for you (and the pics from my aunt’s version, I love the light it gives)!

What you need:

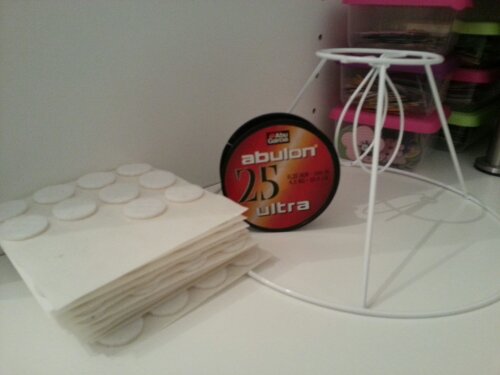
  • imagea lampshade, with or without fabric
  • vlieseline, same amount as the fabric you choose. Not sure how much I used to be honest but the size of your flowers matters so just go for something and purchase more if needed
  • cotton fabric of any desired color, white might look best if you only can find white vlieseline
  • a few meters of fishing line or any other discrete and strong thread available
  • floor protectors, I went to IKEA and got a few packages of FIXA. Floor protectors anyone?
  • a pair of sharp scissors. You will cut a lot unless you have some other nifty way to cut out the flowers (I was clever enough to use my Sizzix Big Shot, I honestly think this project still would be unfinished without it)
  • some sort of flower template unless you want to draw every single one by hand, might be fun too!
  • iron and an ironing board

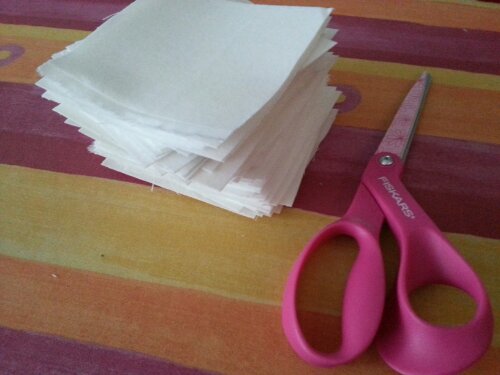
imageNot sure if my methods are the best for this, but since I was going to cut the flowers with my Big Shot I sort of had to cut pieces of the fabric, the die I got included four different styles of flowers which I didn’t want so this step might be unnecessary for some.

Anyhow, start of by ironing the vlieseline on the fabric and make sure it’s stuck. I kept my iron on a lower temperature while cutting out the squares just in case I missed a spot or two.
I cut out a template flower as a help for measuring out how large squares I needed. I ended up with 99 pieces. So happy I decided not to cut them out by hand.
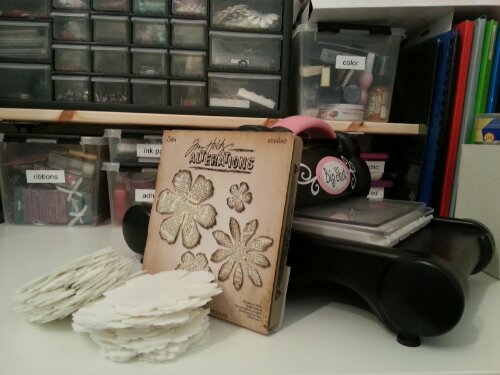
Next I used my Big Shot with a Tim Holtz die named Tattered Florals. It went surprisingly well cutting fabric with the die, I was a bit unsure (first time I used the Big Shot too, everything was scary).
image
With all flowers cut out the next step is the fun part, assembling everything somehow!
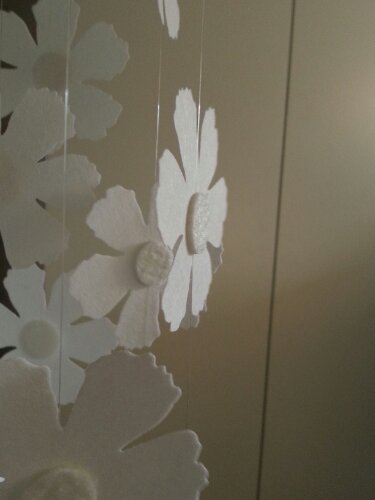
I started with tying a few pieces (quite long ones, wasn’t sure how long I wanted my lamp to be) of the fishing line on the lamp shade and then I simply took one flower and one floor protector and put the line between. The glue on the floor protectors impressed me, had to be a bit careful when putting it all together, I’m a perfectionist so it had to be placed in the middle, or at least somewhat close to it.
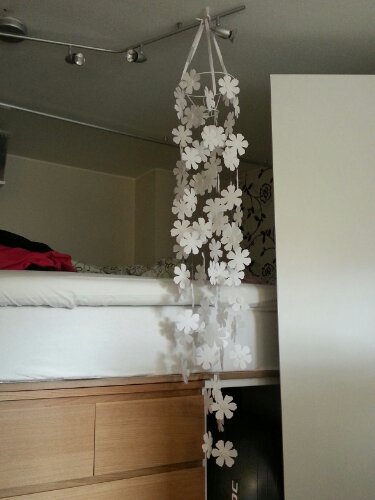
Here’s a few pictures of the current result, I do like the scrawniness somewhat. I might add a few smaller flowers perhaps. I have to see what it looks like with a light bulb in.

image   image

I might have chosen smaller flowers to match my tiny lamp shade better. Oh well, there’s always a next time!


Theme 12: Rainbow

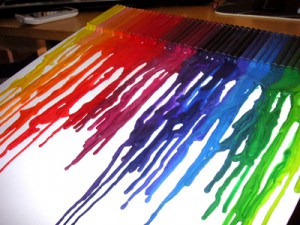
So I took some time and finished a project I’ve been preparing for for a few weeks. Finding somewhere to purchase crayola crayons is harder than you think so I ended up with another brand. Anyway, I stumbled upon this website and fell in love, I wanted to make one myself immediately! And here goes!

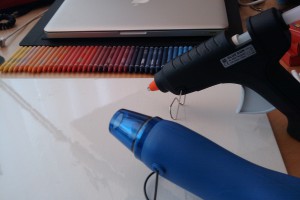
A few things needed: canvas, crayons, hot glue and a heating gun.

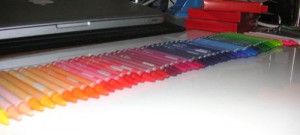
It’s a good start to figure out in which order you want the crayons/colors, I like rainbowish.

Start gluing the crayons on the canvas, be careful not to melt the crayons with the heat. I found it best to put the glue on the canvas and place the crayon on it instead.

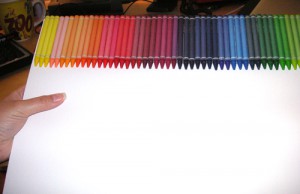
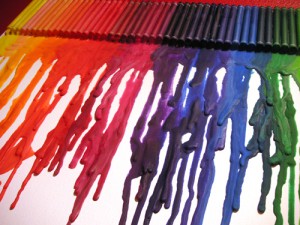
And this is what it looks like all glued to the canvas. Time to use the heating gun!

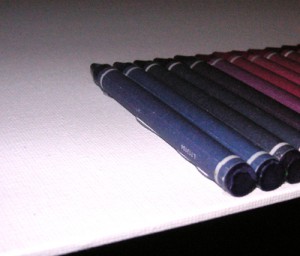
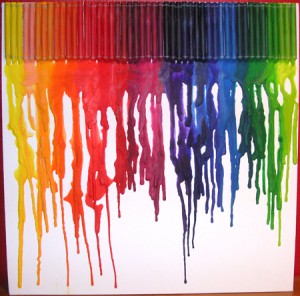
I started melting the crayons on the tips but I think I should have started further up or maybe used another set of crayons to melt and keep these for looks. It does look good with the tips there but it’s a little late for regrets now. Adjust the angle of the canvas after how long lines you want. The wax cools down quite fast but it’s possible to heat it up again if the lines are too short.

I’m quite satisfied with how it came out anyway, might be better next time tho!

All done! Now I just have to figure out how to put it on the wall, but that’s another story.

Theme 97: Retro

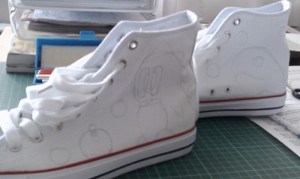
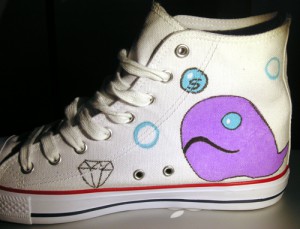
I’ve had a super awesome idea in my head for a while now and this weekend I decided to make it real. I started with purchasing white sneakers (cheap ones in case I’d fail). These ones are from skopunkten.

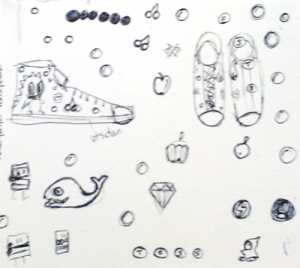
The second step was to do some sketching for what to draw on the shoes. I also ordered pens for coloring on textile.

And for the fun part!

I started with some light sketching on the shoes using a pencil. Be careful not to make to hard lines.. it’s not easy to remove them afterwards.

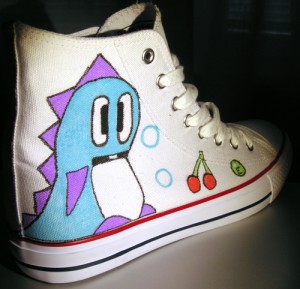
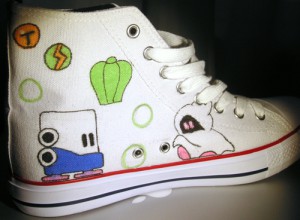
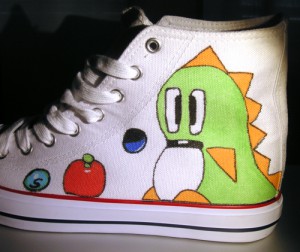
And then, time to put some color to it! I was a bit too eager to color and didn’t let the areas dry before adding a second color right next to it, this causes the color to bleed so be careful!

I must admit that I am very satisfied with the result, I wish I had this idea a few years ago, I feel too old to wear shoes with cartoons on them.

DIY: Yoko’s scarf

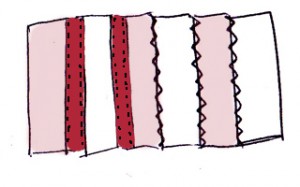
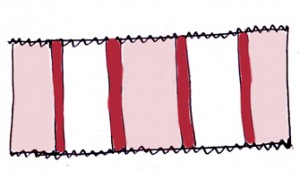
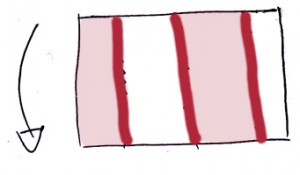
I finally had the time to draw the instructions for how to make the scarf, I’m not very artistic but I hope you can understand it anyway.

First of all you will need to get these items before starting:

  • Fabric, I used fleece in two different colors but use whatever you like! you will need 7 pieces and one piece is 12×42 cm. So if you have a fabric that is 140 cm wide, you’ll need about 30 cm of it. This scarf is quite big so if you prefer a smaller one or a kid sized, you’ll need even less!
  • A 20 cm zipper
  • About 2,5 m silk ribbon of your choice, I recommend to use a ribbon wider than 1 cm.
  • A sewing machine (or a lot of time)
  • Thread
  • Scissors
  • Pins

First step: Cut out 7 pieces of the fabric. Each piece at 12 x 42 cm and measured for 1 cm seam allowance.

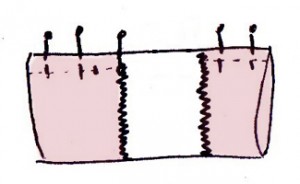
Pin the pieces together with the right sides facing each other, start with one pair and add the pieces one by one. Sew them together with a straight seam.

Since I didn’t have my iron with me, Malin suggested that I sew a wide zig-zag seam over the seams to press them down. Very clever idea!

When you’re done it’s time to attach the ribbons. I measured and cut them on the scarf but they should be about 42 cm long.
Pin and sew the ribbon from the right sides, hide the seams with the ribbons and use a thread in the same color as the ribbon. I sewed quite close to the ribbon edges, as close as possible will give a better result!

When the ribbon is in place I sew a zig-zag seam over the edges to avoid the ribbon from unravel. If you use a fabric that might unravel you will have to do this on all sides.

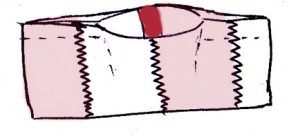
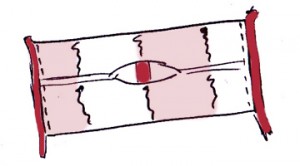
Fold the scarf with the right side facing itself and the zig-zag edges touching. Make sure you see the back side before sewing along the edges and leave a few centimeters open in the middle so you can turn it inside out later on.

The scarf should now look something like this.

And now it’s time for the tricky part. Fold the scarf so the seam is in the middle of it and attach the zipper, one part on each side of the scarf. Make sure it’s turned right and that the zipper is on the inside from here, also make sure the seam-side will become the inside. Pin and sew the zipper, try to get the seam close to the zipper using the appropriate presser foot.
Before sewing you can turn it inside out to check it looks good and seems to be correct, just be careful with the pins.

When you’re done it’s time to turn it inside out and make sure you can use the zipper. If you have to change something just do it now. If not then close the hole on the inside either using your sewing machine or by hand. It will look better if you do it by hand but it works just as good with the machine. Just make sure to leave the outer fabric alone so there will be no seam visible from the outside.

And now you’re all set!

EGON

EGON is a fusion of GRUNDTAL and STAVE. It’s perfect for small apartments and compact living.

I live in a 30 square meter apartment with large windows, many doors and little free wall space due to fantastic planning. And like any girl, I’d love a huge full-size mirror. The only problem is that I don’t have the required wall space available.
When I broke my KRABB mirror (while sleeping) I made my way to IKEA and purchased STAVE without thinking twice. Thrilled over my new mirror I went home and realized that it would be impossible to put it anywhere on the wall except behind a door, which would work perfectly fine except for the fact that I need the space for my purses and shoes.

I asked my dad if it’s possible to hang 10 kg on a door without breaking it, and if he thought we could figure something out for my door. Since I have to use every space possible I already have a bunch of GRUNDTAL hanging around over my doors and my dad took one home for examination.

After removing the protective rubberplasticthingy on the back side he found out that the hooks were drilled and pressed into holes in the main part of GRUNDTAL and it was really easy to remove them!

My dad likes to weld things (unless it’s rust on a car) and had some screws and washers lying around just waiting to be used. So we decided to give it a try and I got to learn how to weld!

After a few hours of preparations and welding (yaay) we got a pretty decent result. A GRUNDTAL with two screws sticking out just enough to fit the holds on the mirror.

I also taped some protective plastic on the backside to avoid marking the door.

Since STAVE should be able to hang both horizontally and vertically we didn’t think it would be an issue to hang it vertically on the door by moving the holds to the shorter sides of the frame. We were wrong. After only one or two days the frame started to break apart. I moved it to the floor before it actually broke.
The frame around the mirror piece is not strong enough to hold the entire weight of the mirror, that’s why the holds were mounted along the longer sides (should have figured that one out).

We went to Bauhaus and purchased an L-shaped aluminium frame, cut it off for perfect fit and drilled holes to fit the ones in the wooden frame.

We put some more hot melt on the backside of the mirror to make it stronger and more stable.

We glued the aluminium and wooden frame together using contact cement (just to make sure it would be strong).

Luckily the original screws were long enough to reach through the aluminium frame too (we did put some glue in the holes as well) and we were able to mount GRUNDTAL safe and strong to the slightly improved STAVE frame.

And voilà! EGON was (re)born!

To avoid the mirror bumping into the door I put some double sided tape (used for scrapbooking, the thicker type) on the bottom part of the frame and to keep the door handle from damaging the mirror I used FIXA.


I still keep an eye out for EGON to make sure it will hold. It’s been a few weeks now and it looks good. In case we need to enhance it later on I think the plan is to add some metal parts in the corners to even out the weight to the longer sides too. If that won’t hold I’ll replace the frame with real oak pieces instead.

The hack cost me less than 700 SEK (about $95 or €75).
STAVE: 549 SEK
GRUNDTAL: 45 SEK
Aluminium frame: 70 SEK
Since the screws, washers, tape, glue and protective plastic were something we had lying around I don’t know the prices, but I doubt it will add up to more than a total of 700 SEK (unless you have to buy glue and tape etc).

Happy hacking!